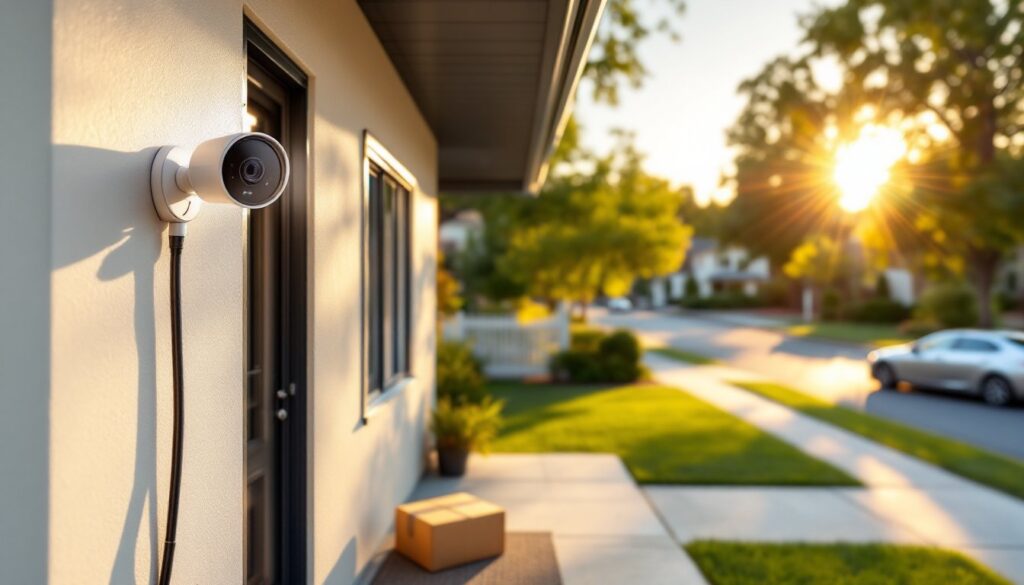
Remote locations don’t need to be blind spots anymore. Cellular solar security cameras eliminate the two biggest headaches in outdoor monitoring, running power lines and chasing Wi-Fi signals through walls and yards. Whether you’re securing a detached garage, a barn, a job site, or a gate at the end of a long driveway, these cameras pull 4G or 5G data from the air and power from the sun. No electrician. No router extenders. Just a mounting surface and a clear view of the sky.
Table of Contents
ToggleKey Takeaways
- Cellular solar security cameras eliminate the need for running power lines and Wi-Fi networks by using 4G/5G data and solar charging, making them ideal for remote locations like detached garages, barns, and job sites.
- Cellular solar cameras outperform Wi-Fi alternatives in reliability and reach since they connect directly to cell towers instead of routers, avoiding connection drops from power outages or bandwidth congestion.
- A properly sized solar panel (3–6 watts) paired with a rechargeable 5,000–10,000 mAh battery can maintain year-round operation when positioned for 4–6 hours of daily direct sunlight at your latitude.
- Key features to prioritize include 2K or 4K resolution for facial and license plate clarity, motion detection with AI-powered person/vehicle recognition, and IP65+ weather rating for outdoor durability.
- Mount your cellular solar security camera 8–10 feet high with the solar panel angled south and tilted at your latitude, while testing cell signal strength at the location to ensure reliable connectivity.
- Budget $10–$25 monthly for cellular data plans and expect video quality to default to lower resolution on cellular connections due to data bandwidth limitations.
What Is a Cellular Solar Security Camera?
A cellular solar security camera operates independently from both home power grids and Wi-Fi networks. Instead of connecting to your router via 2.4 GHz or 5 GHz bands, it uses a cellular data plan, typically through 4G LTE or 5G networks, to transmit video, alerts, and live streams directly to your smartphone.
The solar component replaces constant wiring or battery swaps. An integrated or add-on photovoltaic panel charges an internal rechargeable battery during daylight hours, maintaining operation even through cloudy stretches or winter months with reduced sun exposure.
Most models include a SIM card slot (either nano-SIM or embedded eSIM) that connects to a carrier network. You’ll need a compatible data plan, which some manufacturers bundle at signup or offer as a monthly subscription separate from cloud storage fees.
These cameras suit locations where pulling Ethernet cable isn’t practical and Wi-Fi simply won’t reach, think outbuildings, RV parking pads, construction trailers, or the far corners of larger properties. They’re also popular for off-grid cabins and seasonal properties where turning on utilities just for a camera doesn’t make sense.
Why Choose Cellular Over Wi-Fi for Outdoor Security
Wi-Fi range drops fast once you step outside, especially through vinyl siding, brick, or stucco. Even with a mesh extender, signal strength degrades past 100–150 feet in open air, and walls cut that roughly in half. Cellular cameras bypass the router entirely, pulling signal from the nearest cell tower instead.
Reliability is the main advantage. Wi-Fi cameras lose connection during router reboots, power outages, or bandwidth congestion when the kids are streaming. Cellular models keep recording as long as the battery holds and the tower signal is live. That makes them harder to disable, an intruder can’t just cut your internet line or jam a frequency as easily.
Installation flexibility is the second win. You’re not tethered to the house or limited by Ethernet drops. Mount the camera wherever the security need is greatest and the solar panel can see sky, even if that’s 300 feet from the nearest outlet.
Downsides exist. Cellular data plans add a recurring cost, budget $10–$25/month depending on carrier and data cap. Video uploads chew through data, so most cameras default to lower resolution on cellular or trigger-based recording rather than 24/7 streaming. And if you’re in a rural area with weak cell coverage, performance will suffer just like your phone does.
For properties with strong existing Wi-Fi and close camera placement, cellular doesn’t make sense. But for perimeter monitoring, remote structures, or backup security layers, the independence is worth the subscription.
How Solar Power Keeps Your Camera Running Year-Round
Solar-powered cameras pair a rechargeable lithium-ion battery (typically 5,000–10,000 mAh) with a small solar panel rated between 2 and 6 watts. In full sun, even a 3-watt panel generates enough daily charge to offset typical power consumption from motion detection, recording clips, and transmitting data.
Most systems are designed around perpetual operation, meaning the panel produces slightly more energy than the camera uses on an average day. During summer with 10+ hours of daylight, the battery stays topped off. In winter, shorter days and lower sun angles reduce charging, but a properly sized system should still maintain a net-positive charge if the camera isn’t recording constantly.
Placement matters. A panel angled toward the sun at roughly your latitude (around 35–40 degrees for most of the contiguous U.S.) captures maximum energy. Shade from trees, eaves, or roof lines will cut production significantly. Even partial shade on a small panel can drop output by 50% or more.
Some cameras include the panel in the housing: others use a separate panel connected by a weather-sealed cable. Detachable panels offer more flexibility, you can mount the camera under an eave for weather protection and position the panel in full sun a few feet away.
Battery capacity determines how many cloudy days or nights of heavy use the camera can handle before going dark. A 10,000 mAh battery might last 2–4 weeks without any solar input, depending on recording frequency and temperature. Cold weather reduces lithium-ion performance, so expect shorter runtimes below freezing.
If your site gets less than 4 hours of direct sun daily, or you’re in a region with extended overcast winters, you may need to manually recharge the battery once or twice per season. Budget cameras with undersized panels (under 2 watts) often struggle to stay charged in real-world conditions.
Key Features to Look for When Buying
Resolution starts at 1080p on budget models, but 2K or 4K sensors deliver clearer facial detail and license plate readability at distance. Higher resolution burns more data and battery, so many cameras let you toggle quality based on whether you’re on cellular or viewing stored clips. Reviews from real-world testing over multiple months often reveal how cameras handle resolution vs. battery life trade-offs.
Night vision comes in two flavors: infrared (IR) or color night vision via built-in spotlights. IR produces black-and-white footage and works passively without alerting anyone. Spotlights enable full-color recording but announce the camera’s presence and drain more power. Some models switch modes automatically based on detected motion.
Motion detection quality separates serious cameras from toys. Look for PIR (passive infrared) sensors that detect body heat rather than just pixel changes, which reduces false alerts from swaying branches or passing clouds. AI-powered person/vehicle detection is becoming standard in mid-range and premium models and cuts notification spam dramatically.
Two-way audio lets you talk through the camera via a built-in speaker and microphone. Useful for greeting delivery drivers or warning off trespassers, though audio quality varies. Wind noise is a common complaint.
Storage options usually include cloud recording (subscription required) and local microSD card slots (typically supporting up to 128 GB or 256 GB). Cellular bandwidth limits mean most cloud uploads are event-triggered rather than continuous. Local storage provides a backup, but if someone steals the camera, the footage goes with it.
Weather rating should be at least IP65 for dust and water resistance. Cameras rated IP66 or IP67 handle direct rain and hose spray better. Check operating temperature range if you’re in a region with harsh winters or desert summers, many cameras shut down below –4°F (–20°C) or above 140°F (60°C).
Carrier compatibility matters if you’re bringing your own SIM. Some cameras are locked to specific carriers or require a plan purchased directly from the manufacturer. Verify supported bands (especially for rural areas) and whether the device supports dual-SIM or eSIM for carrier flexibility.
Installation Tips for DIY Homeowners
Most cellular solar cameras install in under an hour with basic hand tools. Unlike hardwired security systems that might require permits or electrical code compliance, these are low-voltage battery devices that fall outside most permitting requirements. Always check local ordinances if you’re mounting on a fence line or aiming a camera toward a neighbor’s property, privacy laws vary by jurisdiction.
Safety first: If you’re working on a ladder, have a spotter. Wear safety glasses when drilling into masonry or metal siding, and use gloves when handling sharp mounting brackets.
Choosing the Right Location for Maximum Sun Exposure
The solar panel needs 4–6 hours of direct sunlight daily to keep the battery charged. Face the panel south (in the Northern Hemisphere) and tilt it at an angle roughly equal to your latitude, most adjustable mounts allow 20–50 degrees of tilt.
Avoid mounting under roof overhangs, dense tree canopies, or north-facing walls that stay shaded most of the day. Even a small shadow from a gutter or tree branch can cut charging efficiency by half. If the camera housing includes the panel, you may need to compromise between optimal sun angle and optimal camera angle, prioritize the sun unless you have a detachable panel.
Test cell signal strength at your chosen spot using your phone on the same carrier as the camera’s SIM. Walk around with a signal-testing app or just check bars. If signal is weak, moving the camera even 10–15 feet higher or away from metal siding can make a difference.
Mounting and Positioning Best Practices
Mount the camera 8–10 feet high to keep it out of easy reach but not so high that faces become unrecognizable. Aim the lens slightly downward to capture faces rather than the tops of heads. For driveways or gates, angle the camera to catch vehicles head-on or at a 45-degree approach for plate visibility.
Use the mounting hardware included, but upgrade to stainless steel lag screws or masonry anchors if you’re attaching to brick, stucco, or fiber cement siding. Plastic anchors that come in the box often aren’t rated for outdoor exposure and can fail in freeze-thaw cycles.
If mounting to wood siding or trim, predrill pilot holes slightly smaller than the screw diameter to prevent splitting. For vinyl siding, remove a section and mount to the underlying sheathing or a stud, vinyl alone won’t hold.
For metal or masonry surfaces, use a hammer drill with a carbide-tipped bit and install with sleeve anchors or Tapcon screws. Don’t overtighten, cracking the camera housing voids most warranties.
Run the solar panel cable along the underside of eaves or through conduit if it’s exposed. Zip-tie or clip it every 12–18 inches to prevent wind flap and UV degradation. Most cables are rated for outdoor use, but direct sun exposure over years will make any plastic brittle.
After mounting, test the camera’s view through the app before fully tightening hardware. Adjust angle, check for glare from porch lights or street lamps at night, and confirm motion zones cover entry points without triggering on passing cars or sidewalk traffic.
Allow 24–48 hours for the battery to fully charge before relying on the camera for security. Many models ship partially charged, but a full solar cycle ensures the system is balanced. Similar planning applies when setting up wired camera systems that require power routing.