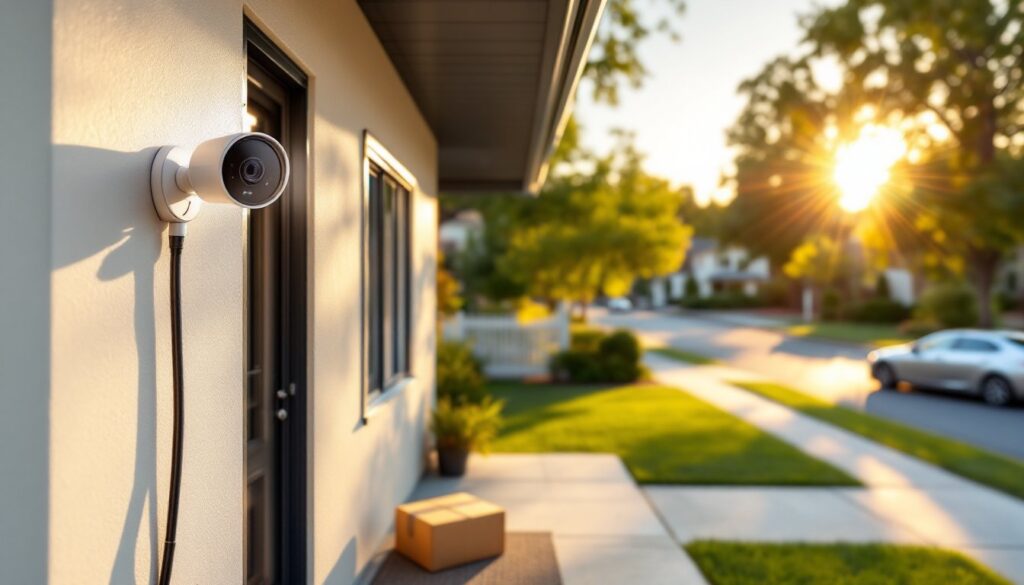
Security cameras have evolved from grainy, fixed-position boxes to smart, adaptive devices that actively scan entire rooms. A 360 rotating security camera offers full-coverage surveillance without the cost of installing multiple units. These cameras pan, tilt, and often track motion automatically, eliminating blind spots in garages, living rooms, and entryways. Whether someone’s looking to monitor a package delivery or keep tabs on a rental property, understanding how these cameras work, and where to mount them, makes the difference between a half-baked setup and real peace of mind.
Table of Contents
ToggleKey Takeaways
- A 360 rotating security camera uses motorized pan-tilt-zoom functionality to monitor entire rooms and outdoor areas from a single unit, eliminating blind spots and reducing installation costs compared to multiple fixed cameras.
- Motion tracking and AI-powered detection features distinguish between people, animals, and vehicles, while smart integrations with Alexa and Google Home enable voice control and automated responses like triggering outdoor lights when motion is detected.
- Prioritize resolution (1080p minimum), field of view (110+ degree wide-angle lens), night vision range (30+ feet outdoor), and weather resistance (IP65/IP66 for exposed locations) when selecting a 360 rotating camera.
- Optimal placement for a 360 rotating security camera is at ceiling height (8–10 feet) in room centers or outdoor eaves, with proper mounting to ceiling joists or structural supports to handle the weight and movement of motorized components.
- DIY installation requires locating structural support, running low-voltage cable with proper outdoor UV-rated cabling, sealing penetrations with silicone caulk, and testing all functions including pan-tilt range, night vision, and motion alerts before finalizing the setup.
- Combining 360 rotating cameras with fixed cameras and wide-angle models provides comprehensive coverage with redundancy—360 cameras excel in large open spaces, while fixed units work better for specific entry points and detailed facial/license plate identification.
What Is a 360 Rotating Security Camera and How Does It Work?
A 360 rotating security camera is a motorized surveillance device that rotates horizontally (pan), tilts vertically, and often pivots 360 degrees on its base to cover an entire room or outdoor area. Unlike fixed cameras that capture one static angle, these units use built-in servos and motors to move the lens in response to motion, user commands via a smartphone app, or pre-programmed patrol routes.
Most models feature pan-tilt-zoom (PTZ) functionality, allowing users to manually direct the camera or let the onboard AI handle tracking. The camera lens sits on a gimbal or rotating mount, with motors that adjust position in real time. When motion is detected, say, a delivery driver approaching the porch, the camera swivels to follow the movement and sends an alert to the homeowner’s phone.
Video is transmitted over Wi-Fi (most consumer models) or Power over Ethernet (PoE) for commercial-grade setups. Resolution ranges from 1080p to 4K, depending on the model. Many 360 cameras use wide-angle lenses (often 110–130 degrees) combined with rotation to eliminate dead zones. Night vision relies on infrared LEDs, and some premium units include color night vision using ambient light or built-in spotlights.
Power options vary: some plug into standard AC outlets, others use rechargeable batteries, and a few support solar panels for outdoor installations. For those planning a wired setup, running low-voltage cable through walls may require drilling and fishing wire, standard DIY work for anyone comfortable with basic electrical tasks, but check local codes if running near existing electrical lines.
Key Benefits of Installing a 360 Rotating Camera for Home Security
The main advantage is coverage. A single 360 camera can monitor an entire room or yard corner-to-corner, reducing the need for multiple fixed cameras. That cuts down on installation time, wiring runs, and subscription fees if the camera requires cloud storage per device.
Active motion tracking is another standout feature. When someone walks through the camera’s field of view, the unit follows them automatically. This is especially useful in large spaces like garages, basements, or open-plan living areas where a fixed camera would miss half the action. Homeowners can review footage of an intruder’s full path rather than piecing together clips from multiple angles.
Remote control via smartphone app lets users pan and tilt the camera from anywhere. Checking on a pet, monitoring a contractor, or verifying that the garage door closed becomes a quick swipe on a phone screen. Many cameras also support two-way audio, allowing real-time communication, handy for telling a delivery driver where to leave a package or scaring off a raccoon raiding the trash.
Cost efficiency matters, too. While 360 cameras typically cost more upfront than basic fixed models ($80–$300 vs. $30–$100), they replace the need for multiple units. A four-camera fixed setup might run $400–$600 with installation: a strategically placed 360 camera can cover the same area for less.
Finally, many 360 cameras integrate with smart home ecosystems like Alexa, Google Home, or Apple HomeKit. Voice commands, automation routines, and syncing with smart lights or locks add layers of convenience. When the camera detects motion at night, it can trigger outdoor lights or send a snapshot to a smartphone lock screen.
Top Features to Look for When Choosing a 360 Security Camera
Not all rotating cameras are created equal. Here’s what separates a solid performer from a frustrating gadget.
Resolution and image quality should be at least 1080p for clear facial recognition and license plate details. 2K or 4K models offer sharper images, especially when digitally zooming during playback. But, higher resolution demands more bandwidth and storage, something to consider if Wi-Fi is slow or cloud storage is expensive.
Field of view matters as much as rotation range. A camera with 360-degree horizontal rotation but a narrow lens still leaves blind spots. Look for models that combine wide-angle lenses (110+ degrees) with full pan-tilt capability. Some units advertise “360 coverage” but only pan 340 degrees, check the specs.
Night vision should extend at least 30 feet for outdoor use. Infrared LEDs produce black-and-white footage: color night vision requires ambient light or built-in spotlights. If the camera will monitor a dark driveway or backyard, confirm the night vision range meets the space’s dimensions.
Storage options include local (microSD card, NAS, or DVR) and cloud-based subscriptions. Local storage avoids monthly fees but risks data loss if the camera is stolen or damaged. Cloud storage offers off-site backup but can run $5–$15/month per camera. Some models, like those reviewed by smart home testing labs, support both.
Weather resistance is critical for outdoor installations. Look for an IP65 or IP66 rating, which indicates protection against dust and water jets. Cheaper models rated IP44 may fail in heavy rain or snow. If mounting under an eave or soffit, lower ratings can work, but exposed locations demand serious weatherproofing.
Motion Tracking and Smart Detection
Motion tracking quality varies widely. Basic models detect any movement and pan toward it, including trees swaying or car headlights. Advanced cameras use AI to distinguish between people, animals, and vehicles, reducing false alerts.
Detection zones let users define areas where motion triggers recording. For example, a camera aimed at a driveway can ignore sidewalk traffic while still capturing cars pulling in. This feature is especially useful near busy streets or property lines.
Person detection uses AI to identify human shapes, filtering out pets or debris. Some cameras go further with facial recognition, storing profiles of known visitors and flagging strangers. Note that facial recognition may raise privacy concerns and could be restricted by local laws, check regulations before enabling it.
Package detection has become popular as porch piracy rises. Cameras with this feature send alerts when a box appears in the frame, and some can distinguish between delivery and removal. Pairing this with two-way audio lets homeowners interact with delivery drivers or deter thieves.
Sound detection (glass breaking, smoke alarms, crying) adds another layer of awareness. If a camera is monitoring a workshop or laundry room, audio alerts can catch problems before they escalate.
Best Placement Strategies for Maximum Coverage
Mounting height and angle determine how much area a 360 camera actually covers. Ceiling mounts in the center of a room provide true 360-degree views, ideal for living rooms, foyers, or retail spaces. Aim for 8–10 feet above the floor, high enough to avoid tampering, low enough for clear facial detail. Use a stud finder to locate ceiling joists: drywall anchors alone won’t support the camera’s weight and movement.
Corner mounts work well when full rotation isn’t needed. A camera placed in an upper corner can cover 270 degrees of a room while staying out of the way. This approach suits bedrooms, home offices, or nurseries where a central ceiling mount feels intrusive.
For outdoor installations, mount the camera under eaves or soffits to shield it from direct weather exposure. Position it 10–12 feet high to prevent easy tampering but ensure the tilt range allows ground-level coverage. Avoid aiming cameras directly at windows or reflective surfaces, glare and IR reflection degrade image quality.
Avoid backlighting. Mounting a camera facing a bright window or setting sun creates silhouettes, making faces unrecognizable. If that’s unavoidable, enable WDR (wide dynamic range) in the camera settings to balance exposure.
Power and connectivity matter. Outdoor cameras near an outlet simplify installation, but running low-voltage cable through exterior walls requires drilling and sealing penetrations with caulk to prevent water intrusion. For battery-powered models, ensure the mounting location allows easy access for recharging or swapping batteries.
Test coverage before finalizing the mount. Many camera apps include a live view or temporary setup mode, use it to confirm the rotation range captures critical areas like doors, driveways, or valuables. Adjusting placement by even a foot can eliminate blind spots.
DIY Installation: Step-by-Step Setup Guide
Installing a 360 camera is straightforward for anyone comfortable drilling holes and running cable. Here’s the process.
Tools and materials:
- Drill with bits (masonry bit for brick/concrete, wood bit for studs)
- Stud finder (for ceiling or wall mounts)
- Screwdriver or drill driver
- Level
- Pencil
- Wire fish tape (if running cable through walls)
- Silicone caulk (outdoor installations)
- Safety glasses
Steps:
-
Plan the location. Use the camera app’s live view to test angles from different spots. Mark the final position with a pencil.
-
Locate mounting support. For ceiling mounts, use a stud finder to locate a joist. Mounting to drywall alone risks the camera falling. If joists don’t align, install a mounting block (a small piece of plywood) across two joists, then attach the camera bracket to the block.
-
Drill pilot holes. Mark screw positions with the mounting bracket as a template. Drill pilot holes slightly smaller than the screw diameter to prevent splitting wood or cracking drywall.
-
Run power and data cables (if wired). For PoE cameras, run Cat5e or Cat6 cable from the camera location to the network switch or NVR. Use a wire fish tape to pull cable through walls or attics. Outdoor cable runs should use UV-rated outdoor Ethernet cable and conduit where exposed.
-
Attach the mounting bracket. Secure it with the provided screws. For brick or concrete, use masonry anchors rated for the camera’s weight (typically 1–3 pounds).
-
Connect the camera. Attach power (AC adapter or PoE) and snap or screw the camera body onto the bracket. Check that the camera rotates freely without hitting walls or ceilings.
-
Seal outdoor penetrations. Apply silicone caulk around cable entry points to prevent water infiltration. Many installers miss this step, leading to moisture damage inside walls.
-
Configure the app. Download the manufacturer’s app, create an account, and add the camera using the QR code or serial number. Connect to Wi-Fi (2.4 GHz networks work better through walls than 5 GHz). Set detection zones, motion sensitivity, and notification preferences.
-
Test all functions. Pan, tilt, zoom, night vision, two-way audio, and motion tracking. Walk through the camera’s field of view to confirm alerts trigger properly. Adjust sensitivity if pets or car headlights cause false alarms.
Safety notes: Wear safety glasses when drilling overhead. If running cable near existing electrical wiring, turn off power at the breaker and maintain at least 6 inches of separation to avoid interference. For installations above 10 feet, use a sturdy ladder with a helper to stabilize it.
360 Rotating Cameras vs. Fixed and Wide-Angle Cameras
Choosing between camera types depends on the space, budget, and monitoring goals.
360 rotating cameras excel in large, open areas where a single unit can replace multiple fixed cameras. They’re ideal for monitoring entire rooms, driveways, or yards. Motion tracking adds value when covering zones with frequent activity, garages, entryways, or play areas. But, they cost more upfront ($80–$300) and require stable Wi-Fi for smooth pan-tilt operation. Mechanical parts (motors, gimbals) are potential failure points over time.
Fixed cameras are simpler and cheaper ($30–$100). They work well for monitoring specific choke points: front doors, gates, or cash registers. Installation is faster since there’s no need to test rotation range. Fixed cameras with wide-angle lenses (130+ degrees) can cover broad areas without moving parts, improving reliability. The tradeoff? They miss activity outside their fixed frame, and there’s no tracking or user-controlled panning.
Wide-angle (fisheye) cameras capture 180–360 degrees in a single frame without moving. Ceiling-mounted fisheye units provide true panoramic views, often with digital de-warping in playback to create flat, usable footage. They’re reliable (no motors) and cover large areas, but resolution suffers at the edges of the frame. Facial detail degrades beyond 15–20 feet, limiting their use for identification. Expect to pay $100–$400 for quality fisheye models.
Many homeowners planning a comprehensive installation combine camera types: fixed units at entry points, a 360 camera in the main living area, and wide-angle coverage for garages or basements. According to home tech reviewers, layering camera types provides redundancy, if one unit fails or gets obstructed, others fill the gap.
For outdoor perimeters, fixed cameras with tight fields of view often outperform 360 models. A 360 camera scanning a large yard may miss details like license plates or faces. Fixed cameras aimed at the driveway and front walk, combined with motion-activated lights, deliver better identification footage.
Budget also drives the decision. A $200 360 camera might seem expensive until compared to a four-camera fixed setup at $400–$600. But for small homes or apartments, two fixed cameras often suffice and cost less overall. Smart home technology sites recommend sketching a floor plan, marking coverage zones, and comparing single-unit vs. multi-camera costs before committing.