In a world where doorbells are smarter than most of us, installing home security cameras is no longer a luxury—it’s a necessity. Imagine this: you’re cozied up on the couch, popcorn in hand, and your home is under the watchful eye of your new tech-savvy guardians. With just a few clicks, you can keep an eye on your property, even while you’re off enjoying life.
Home security cameras not only deter potential intruders but also give peace of mind that’s worth its weight in gold. And let’s be honest, who wouldn’t want to catch that nosy neighbor in the act of borrowing their lawnmower? With the right setup, you’ll transform your home into a fortress that even the most daring burglars will think twice about approaching. So let’s dive into the world of home security camera installation and turn your home into a safe haven.
Home Security Cameras Installation Overview
Home security camera installation involves several crucial steps to ensure optimal protection. Selecting the right locations for cameras enhances coverage. They should face entry points like doors and driveways, which are common intrusion areas.
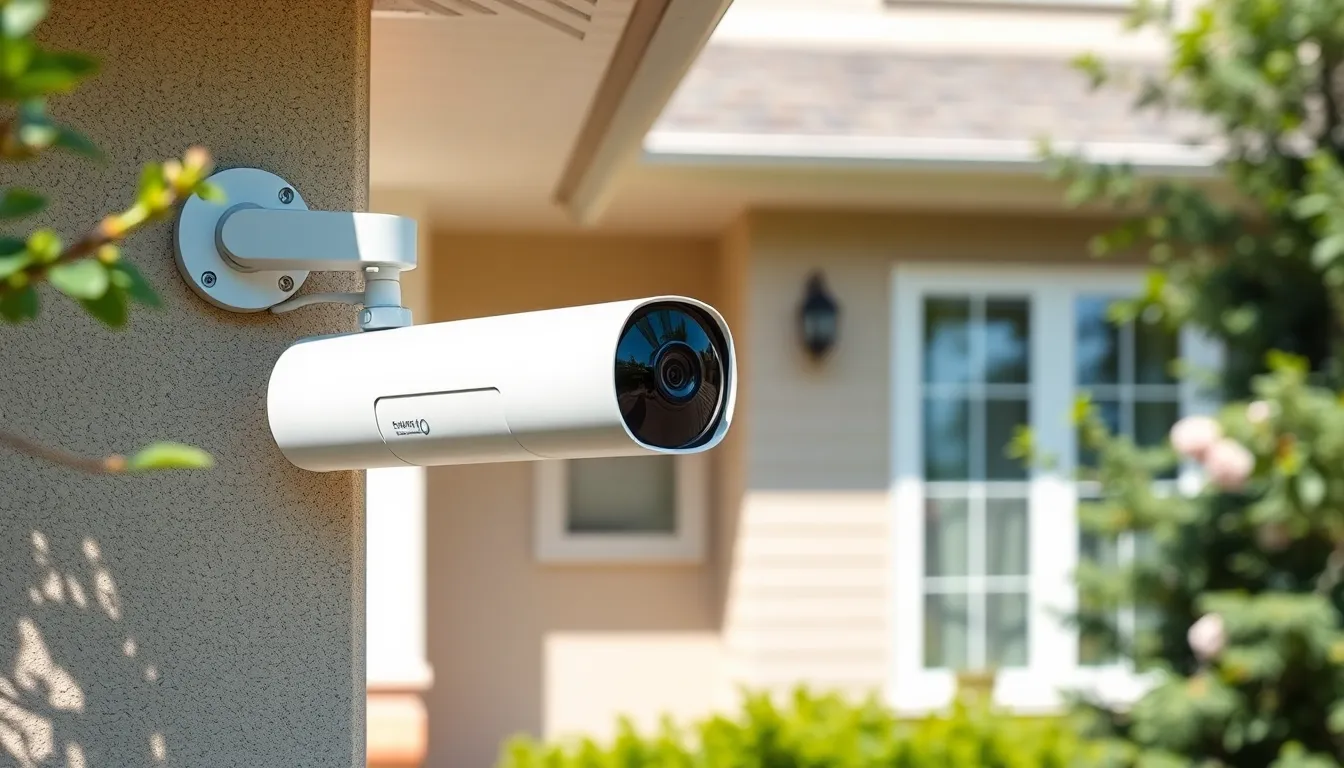
Mounting cameras at appropriate heights improves visibility and reduces tampering risks. Cameras should be positioned 7 to 10 feet off the ground for the best field of view.
Wiring can be part of the installation process, especially for wired cameras. Running cables through walls often creates a cleaner look. Battery-operated options, however, simplify installation since they require no wires.
Connecting cameras to a Wi-Fi network is necessary for remote monitoring. It typically involves scanning QR codes or entering the Wi-Fi password during setup. Verification of the camera’s connectivity through a mobile app or computer interface ensures a successful installation.
Testing camera functionality comes next to confirm proper operation. Checking video quality and angles ensures complete coverage. Adjustments may be needed to eliminate blind spots or ensure clear imagery.
Finally, configuring motion detection settings reduces unnecessary alerts while providing effective monitoring. Establishing specific zones for detection maximizes camera efficiency. Homeowners benefit from utilizing cloud storage for recorded footage, which allows for easy retrieval.
Trusting this installation process creates a strong layer of security for homes. Investing time in setting up the system leads to significant peace of mind, knowing properties are monitored effectively.
Choosing The Right Cameras
Selecting the proper security cameras ensures effective monitoring and protection for any home. Factors like camera types and features play crucial roles in this decision.
Types Of Home Security Cameras
Varieties of home security cameras include indoor models, outdoor models, bullet cameras, and dome cameras. Indoor cameras excel in monitoring spaces like living rooms or nurseries, while outdoor cameras withstand weather elements. Bullet cameras provide a visible deterrent for intruders, and dome cameras blend discreetly into surroundings. Wireless options offer flexibility in installation locations without needing cables. Some users may prefer wired systems for reliability and uninterrupted power. Evaluating these options helps determine which type aligns with specific needs.
Features To Consider
Features significantly impact camera effectiveness and user satisfaction. High-definition video quality, ideally 1080p or above, enhances clarity during playback. Infrared night vision ensures visibility in low-light conditions, increasing security after dark. Two-way audio allows communication with visitors or intruders. Cloud storage options facilitate accessing recorded footage, while local storage offers control without additional costs. Motion detection and alerts inform homeowners of potential threats in real-time. Evaluate these features based on personal needs to create an efficient security setup.
Preparing For Installation
Preparing for home security camera installation involves careful planning and assessment. Effective security measures result from thoughtful preparation.
Assessing Your Home’s Security Needs
Start by evaluating potential vulnerabilities in the property. Identify all entry points, including doors and windows, that may require monitoring. Consider factors like neighborhood crime rates and specific times when security is most crucial. For high-risk areas, installing multiple cameras offers added protection. Identify your monitoring preferences, whether real-time viewing or recorded footage is preferred. Prioritizing essential zones, such as the front porch and backyard, ensures effective coverage.
Selecting Camera Locations
Choose camera locations thoughtfully for optimal coverage. Position cameras at least 7 to 10 feet above the ground to avoid tampering and enhance visibility. Focus on critical spots like entrances and driveways first. Additionally, under eaves or porches provides shelter from various weather conditions. Ensure the camera faces away from sunlight to avoid glare that diminishes quality. Accessibility for maintenance, wiring, or battery replacement plays a vital role in decision-making. Cover areas with foot traffic or outdoor equipment for comprehensive surveillance.
Installation Process
The installation process requires careful attention to detail and preparation for long-term effectiveness.
Tools And Equipment Needed
Essential tools for installation include a power drill, screwdriver, and a ladder for reaching elevated areas. Depending on the camera type, additional equipment such as a wire stripper or Ethernet cables may be necessary. Homeowners also need a smartphone or computer for app installation and camera integration. Maintaining access to a stable Wi-Fi connection ensures seamless remote monitoring capabilities. Lastly, utilizing a level tool aids in mounting cameras accurately, promoting optimal coverage.
Step-By-Step Installation Guide
Begin by marking camera locations after assessing property vulnerabilities and identifying critical areas. Next, mount cameras securely, ensuring they sit 7 to 10 feet above the ground for improved visibility. Connecting wired cameras necessitates running cables discreetly while ensuring accessibility for maintenance. For wireless models, follow the manufacturer’s instructions to connect them to the Wi-Fi network. Once connected, configure motion detection settings, adjusting sensitivity according to personal preferences. Test each camera thoroughly to confirm functionality, completing the installation with cloud storage setup for recorded footage.
Configuring Your Cameras
Configuring cameras ensures they operate effectively and meet security needs.
Connecting To Wi-Fi
Connecting cameras to Wi-Fi enables remote access. First, ensure the home network supports the camera’s requirements. Next, download the camera’s companion app on a smartphone or tablet. Follow the app’s prompts to connect to Wi-Fi. Enter the network credentials accurately to establish a connection. A strong signal boosts camera performance and minimizes disconnection issues. If the Wi-Fi signal is weak, consider using a range extender. After confirming the connection, cameras will sync with the app, providing access to live feeds anytime and anywhere.
Setting Up Notifications And Alerts
Setting up notifications enhances security awareness. Access the camera settings through the app after completing the Wi-Fi connection. Users can often select preferred notification types, such as motion alerts or camera status updates. Enabling push notifications keeps homeowners informed about unexpected movements. Customizing sensitivity settings optimizes alerts to reduce false activations. By creating specific zones, cameras focus on critical areas like doorways while ignoring less important spots. Timely notifications help in quick responses to potential security threats.
Maintenance And Troubleshooting
Regular maintenance ensures home security cameras operate effectively. Schedule routine checks to keep lenses clean and assess functionality.
Regular Maintenance Tips
Clean the camera lenses with a microfiber cloth to prevent smudges affecting video clarity. Inspect connections and cables for any signs of wear or damage. Check the firmware regularly and update it to access the latest features and security patches. Test motion detection systems periodically; adjust settings as necessary to reduce false alerts. Finally, ensure that the camera’s power source remains reliable—replace batteries in battery-operated models as needed to avoid interruptions in monitoring.
Common Issues And Solutions
Loss of connection to Wi-Fi often leads to camera malfunctions. Restarting the router usually resolves this issue. Additionally, video quality can suffer from poor lighting conditions; positioning cameras to improve visibility can enhance performance. If cameras fail to send alerts, verifying the notification settings in the app can help. Lastly, resolving storage issues may involve clearing cloud space or ensuring subscription plans meet footage requirements, allowing for uninterrupted recording.
Investing in home security cameras is a proactive step toward ensuring safety and peace of mind. With careful planning and strategic installation, homeowners can significantly enhance their property’s security. Selecting the right type of camera and positioning them effectively allows for comprehensive monitoring of vulnerable areas.
Regular maintenance and troubleshooting are essential for keeping the system functioning optimally. By staying vigilant and making necessary adjustments, homeowners can enjoy the benefits of a reliable security setup. Ultimately, a well-installed home security camera system not only deters potential threats but also provides valuable insights into daily life.